Owning a vintage ceiling fan is a nod to timeless design and enduring craftsmanship. These classic fixtures, often more robust than their modern counterparts, can provide decades of reliable service with the right care. If your beloved vintage fan has started to squeak, grind, or spin sluggishly, it’s likely yearning for some fresh lubrication. Oiling your vintage ceiling fan motor is a satisfying DIY task that can restore its quiet operation, extend its lifespan, and keep it circulating air efficiently for years to come.
Understanding Your Vintage Ceiling Fan: Why Oiling Matters
Unlike many contemporary ceiling fans that feature sealed, maintenance-free bearings, most vintage models rely on an oil bath lubrication system. This ingenious design ensures continuous lubrication of the internal components, allowing them to operate smoothly and quietly. Over time, however, this oil can deplete, thicken, or become contaminated, leading to friction and wear.
Signs Your Fan Needs Oiling: The most common indicators that your vintage fan requires lubrication are distinct noises. A persistent squeaking or grinding sound often signals a lack of oil reaching the bearings. You might also notice a decrease in the fan’s speed or a slight hesitation in its rotation, even on higher settings. Addressing these symptoms promptly is crucial.
Benefits of Proper Oiling: Regular and correct oiling offers several key advantages. It significantly prolongs the fan’s life by reducing wear and tear on the motor’s bearings. Lubricated components operate with less friction, translating to smoother, quieter performance and improved energy efficiency. Crucially, it also mitigates the risk of motor overheating and potential burnout, ensuring the fan’s safe operation.
Choosing the Right Lubricant for Your Classic Fan
Selecting the correct oil is paramount when maintaining a vintage ceiling fan. Using the wrong type can do more harm than good, leading to gummed-up bearings or even fire hazards.
The Golden Rule: Non-Detergent Motor Oil
For most vintage ceiling fan motors, the gold standard is non-detergent electric motor oil. This type of oil is specifically formulated without cleaning additives that can cause foam or residue buildup in the fan’s delicate internal mechanisms.
- Recommended SAE Weights: Look for a 10, 15, or 20-weight non-detergent motor oil. The specific weight can sometimes be found in your fan’s original owner’s manual.
- Specific Brands: Some vintage Hunter Original fans, known for their robust oil bath systems, may even have their own branded SAE 10 non-detergent oil, which is highly recommended for those specific models.
|
Our Picks for the Best Ceiling fan in 2026
As an Amazon Associate I earn from qualifying purchases.
|
||
| Num | Product | Action |
|---|---|---|
| 1 | Asyko 46" Low Profile Ceiling Fan with Light and Remote Control,Black Modern Flush Mount Ceiling Fan with Lights for Bedroom, Reversible, Dimmable, Noiseless |

|
| 2 | Fanbulous 52 Inch Ceiling Fans with Lights and Remote, Stepless Color Temperature Change & Dimmable 20W LED Ceiling Fan, 6 Speeds Reversible Quiet DC Motor for Bedroom, Living Room, Apartment, Black |
|
| 3 | Ceiling Fans with Lights - 42 Inch Low Profile Ceiling Fan with Light and Remote, Reversible DC Motors, 3CCT Dimmable Timer Noiseless, Black Flush Mount Ceiling Fan for Bedroom/Living Room |
|
| 4 | Ceiling Fans with Lights, 42 Inch Ceiling Fan with Light And Remote, 3CCT Flush Moun Low Profile Ceiling Fans, 6 Speed Noiseless LED Ceiling Fan, Black Ceilings Fan with Remote for Bedroom Living Room |
|
| 5 | ZMISHIBO 52 Inch Ceiling Fan with Light, App&Remote Control, Flush Mount Low Profile, Dimmable 20W LED Light, Quiet Reversible Motor for Bedroom, Living Room, Apartment, Black |
|
| 6 | Ceiling Fans with Lights, 52 Inch Modern Ceiling Fans with Lights and Remote Control, DC Reversible Motor, Noiseless, 3CCT, Ceiling Fan for Bedroom, Living Room, Apartment Indoor/Outdoor Use |
|
| 7 | ZMISHIBO Ceiling Fans with Lights and Remote, 19.7'' Low Profile Ceiling Fan, 3000-6000K Dimmable Modern Flush Mount LED Fan Light, 6 Wind Speeds, Black Fandelier Ceiling Fans for Bedroom |
|
| 8 | Amico Ceiling Fans with Lights, 42 inch Low Profile Ceiling fan with Light and Remote Control, Flush Mount, Reversible, 3CCT, Dimmable, Noiseless, Black Ceiling Fan for Bedroom, Indoor/Outdoor Use |
|
| 9 | Passky Ceiling Fans with Lights, 52 inch Sleek Ceiling Fan with Light and Remote Control, 3CCT, Dimmable, Reversible, Noiseless, Black Ceiling Fan for Bedroom, Living Room |
|
| 10 | addlon Ceiling Fans with Lights, 42 Inch Low Profile Ceiling Fan with Light and Remote Control, Flush Mount, Reversible, 3CCT, Dimmable, Quiet, Black Small Ceiling Fan for Bedroom Indoor/Outdoor Use |
|
Why Avoid WD-40 and Common 3-in-1 Oils
It’s a common misconception that WD-40 can lubricate a fan motor. However, WD-40 is primarily a water displacement and penetrating solvent, not a long-term lubricant. While it might temporarily quiet a squeak, it quickly evaporates, leaving behind a thin, ineffective residue that can attract dust and exacerbate the problem. Similarly, many general-purpose 3-in-1 oils contain detergents or are not formulated for the continuous, high-speed lubrication needs of an electric motor, potentially leading to gummed-up bearings over time. Always check the label to ensure it’s a non-detergent motor oil suitable for electric motors.
Exploring Synthetic Options for Enhanced Performance
For enthusiasts looking for superior performance and longevity, synthetic lubricants are an excellent choice for vintage fans. Synthetics are engineered to resist oxidation and breakdown, offering greater stability under heat and load. Their molecular structure is designed for optimal friction reduction, making them ideal for high-speed machinery like fan motors. Brands like Royal Purple are favored by some collectors for their many fine qualities.
Gathering Your Tools and Preparing for the Task
Before you begin, ensure you have the necessary supplies and prioritize safety.
Essential Tools and Materials:
- Step Ladder: Stable and tall enough to comfortably reach your fan.
- Non-Detergent Electric Motor Oil: (10, 15, or 20 weight, or manufacturer-recommended).
- Paper Towels or Microfiber Cloths: For cleaning and wiping up spills.
- Multi-Purpose Cleaner: For cleaning external surfaces.
- Pipe Cleaner: Ideal for checking oil levels and cleaning the oil hole.
- Flashlight: To illuminate the oil hole area.
- WD-40 Degreaser (Optional): For stubborn grime, to be used sparingly and allowed to evaporate completely.
- Screwdrivers (Optional): If partial disassembly is required to access the oil hole or clean bearings.
Safety Precautions:
- Turn Off Power: The absolute first step is to turn off the power to your ceiling fan at the circuit breaker. Verify the fan and any attached lights are completely off before proceeding. Use a non-contact voltage tester if you have one for added assurance.
- Stable Ladder: Always use a sturdy, properly positioned stepladder on a level surface. Have someone spot you if possible.
- Wear Gloves: To protect your hands from oil and grime.
Step-by-Step Guide to Oiling Your Vintage Ceiling Fan Motor
Once prepared, you can begin the oiling process. Patience and precision are key to a successful outcome.
Initial Inspection and Locating the Oil Port
- Consult the Manual: If you still have your fan’s owner’s manual, consult it for specific oiling instructions, oil type, and location of the oil hole. Many modern fans do not require oiling due to sealed bearings.
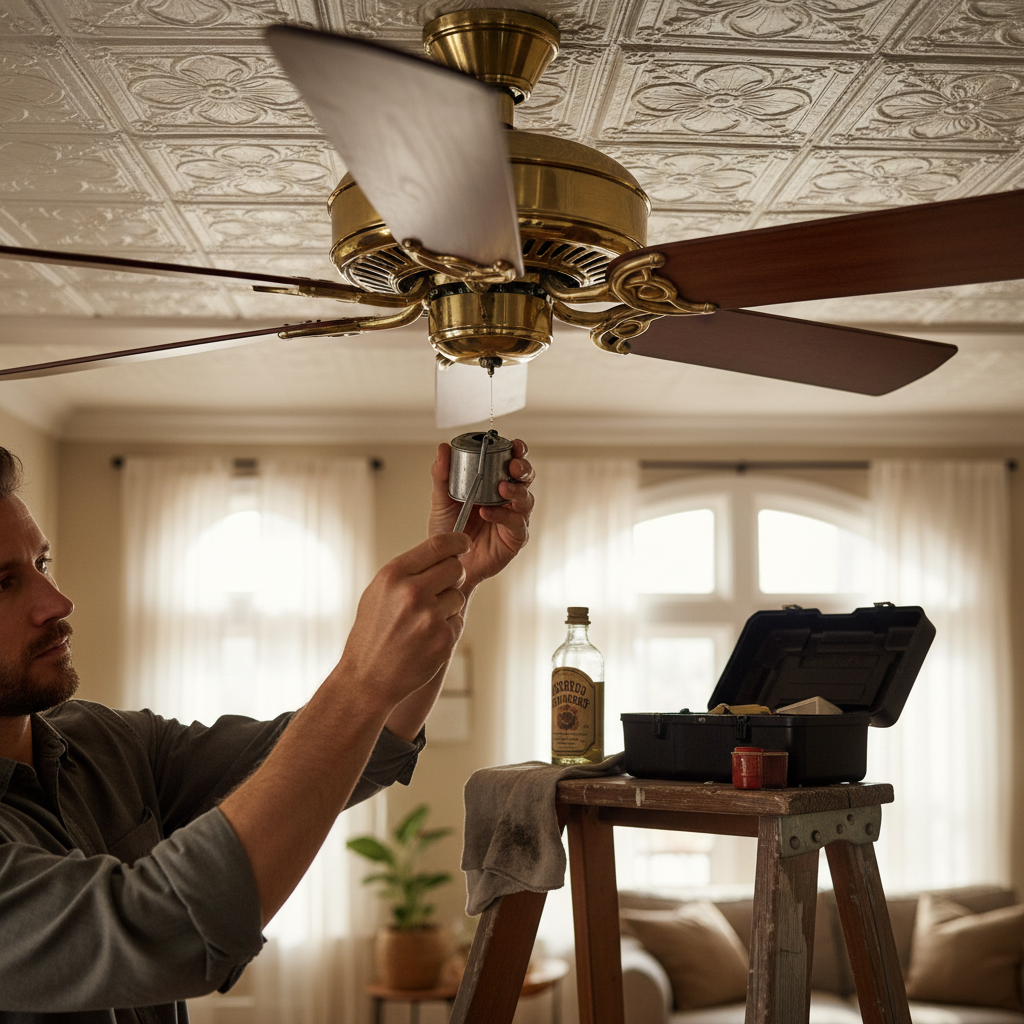
- Locate the Oil Hole: Climb your ladder and carefully examine the top of the fan motor housing, usually near the downrod (the pole connecting the fan to the ceiling). Most vintage fans will have a small, often labeled, hole or port for adding oil. This is your “oil hole” or “oil reservoir.”
Checking Existing Oil Levels and Cleaning
- Check Oil Level: Bend a pipe cleaner into a small hook (about 1/2 inch) and gently insert it into the oil hole. If the pipe cleaner comes out with oil on it, your fan may not need oil, or the issue lies elsewhere. If it’s dry, lubrication is definitely required.
- Clean the Fan: Dust and grime can accumulate on the fan blades and housing. Wipe these down with a multi-purpose cleaner and cloth. For the oil hole and motor area, wipe with a clean rag. If there’s stubborn, hardened grime around the oil hole or within the bearing assembly (common in very old fans with old, solidified lubricants), you can carefully spray a small amount of WD-40 degreaser into the hole using its straw applicator. Allow ample time (1-2 hours) for the degreaser to penetrate and evaporate completely before adding new oil. In cases of extremely gummed-up bearings or solidified wicks, a more extensive disassembly and cleaning might be necessary, including replacing old wool wicking in oil cups if present.
The Oiling Process: Precision and Patience
- Add the Oil: Slowly pour 1 to 2 ounces of the recommended non-detergent motor oil into the oil hole. For fans that haven’t been oiled in a long time, it might take more. Avoid overfilling, as this can lead to leaks.
- Distribute the Oil: Manually rotate the fan blades slowly for several turns. This helps the fresh oil penetrate and distribute throughout the bearings and lubrication system. If your fan requires disassembly to access specific bearings, apply 3-4 drops directly onto the top bearing, spin the motor 10 times, then repeat for the bottom bearing, spinning the motor another 10 times.
- Re-check Oil Level: Use the pipe cleaner again to check the oil level. Continue to add small amounts of oil and re-check until the pipe cleaner indicates the reservoir is adequately filled, but not overflowing.
Post-Oiling Checks and Troubleshooting
- Restore Power and Test: Once you’ve finished oiling, restore power at the circuit breaker and turn the fan on to a slow setting. Listen for any lingering noises and observe its operation. It should run more smoothly and quietly.
- Persistent Issues: If the fan still makes noise or runs irregularly after oiling, the problem might not be lubrication-related. It could indicate worn bearings, an unbalanced motor, or other mechanical issues that might require professional diagnosis or more extensive repair. Avoid adding more oil if it doesn’t resolve the issue, as overfilling can cause leaks and mess.
Beyond Oiling: General Maintenance Tips for Vintage Fans
Oiling is a critical step, but general upkeep ensures your vintage fan remains a cherished household fixture.
- Regular Cleaning: Dust can accumulate quickly, affecting airflow and potentially entering the motor. Regularly wipe down blades and the motor housing.
- Blade Balancing: If your fan wobbles, even slightly, it can put stress on the motor and bearings. Invest in a blade balancing kit or carefully adjust blade weights until the wobble subsides.
- Wiring Checks: Periodically inspect visible wiring for any fraying or damage, especially if the fan has been in place for many years. Ensure all connections are secure.
Conclusion
Oiling your vintage ceiling fan motor is more than just a repair; it’s a revival. By following these DIY steps and using the correct non-detergent electric motor oil, you can silence those irritating squeaks, restore smooth operation, and significantly extend the life of your classic fixture. This hands-on maintenance not only saves you money but also deepens your appreciation for the craftsmanship of a bygone era. So, are you ready to give your vintage ceiling fan the attention it deserves and enjoy its renewed, silent breeze?
Frequently Asked Questions
How often should I oil my vintage ceiling fan?
The frequency depends on usage and the specific fan model, but generally, vintage ceiling fans should be oiled annually or every 1-5 years. If you notice signs like squeaking or slowing, it’s a good indicator that it’s time for lubrication. Always consult your fan’s manual if available.
Can I use any household oil for my fan?
No, it is crucial to use a non-detergent electric motor oil with a weight of 10, 15, or 20. Household oils, especially those with detergents (like many automotive oils) or thin penetrating oils (like WD-40), are unsuitable. They can cause bearings to gum up, leading to worse performance or even motor damage.
What if my fan still makes noise after oiling?
If your fan continues to make noise or operate poorly after proper oiling, the issue may not be lubrication-related. Possible causes include worn-out bearings that need replacement, an unbalanced fan, loose components, or an electrical issue within the motor. In such cases, it’s best to consult a professional fan repair specialist.
Where is the oil hole usually located on a vintage fan?
On most vintage ceiling fans, the oil hole is located on the top of the motor housing, often near where the downrod connects to the motor. It is typically a small, sometimes labeled, opening. If you cannot find a designated oil hole, your specific fan model might not require oiling, as some designs feature sealed bearings.