Is an old, outdated ceiling fan diminishing the aesthetic appeal of your room? Instead of replacing it entirely, which can be both costly and time-consuming, consider giving your existing fan blades a stunning makeover with a fresh coat of paint. This simple DIY project can dramatically transform the look of your space, adding a touch of personalized style and breathing new life into a functional household item. It’s an incredibly satisfying and budget-friendly way to update your home decor, aligning perfectly with modern trends of customization and sustainability. In this comprehensive guide, we’ll walk you through every step of the process, ensuring your fan blade makeover is a resounding success.
Why Give Your Old Fan Blades a Makeover?
Transforming your fan blades is more than just a quick fix; it’s a strategic home improvement choice with several compelling benefits.
Firstly, it’s incredibly cost-effective. Buying a brand-new ceiling fan, especially one with a unique design, can set you back hundreds of dollars. Painting your existing blades utilizes materials you might already have or can purchase affordably, offering a high-impact aesthetic change without a hefty investment.
Secondly, it allows for unmatched customization. Standard ceiling fans often come in a limited range of colors and finishes. By painting your blades, you can perfectly match your existing decor, introduce a bold accent color, or even experiment with decorative patterns, creating a truly unique fixture that reflects your personal style. Imagine a ceiling fan that seamlessly integrates with your furniture or stands out as a vibrant focal point.
Finally, it’s a nod to sustainability. Instead of contributing to landfills by discarding a perfectly functional appliance, you’re extending its life and reducing waste. This eco-conscious approach is not only good for your wallet but also for the planet.
Essential Tools and Materials You’ll Need
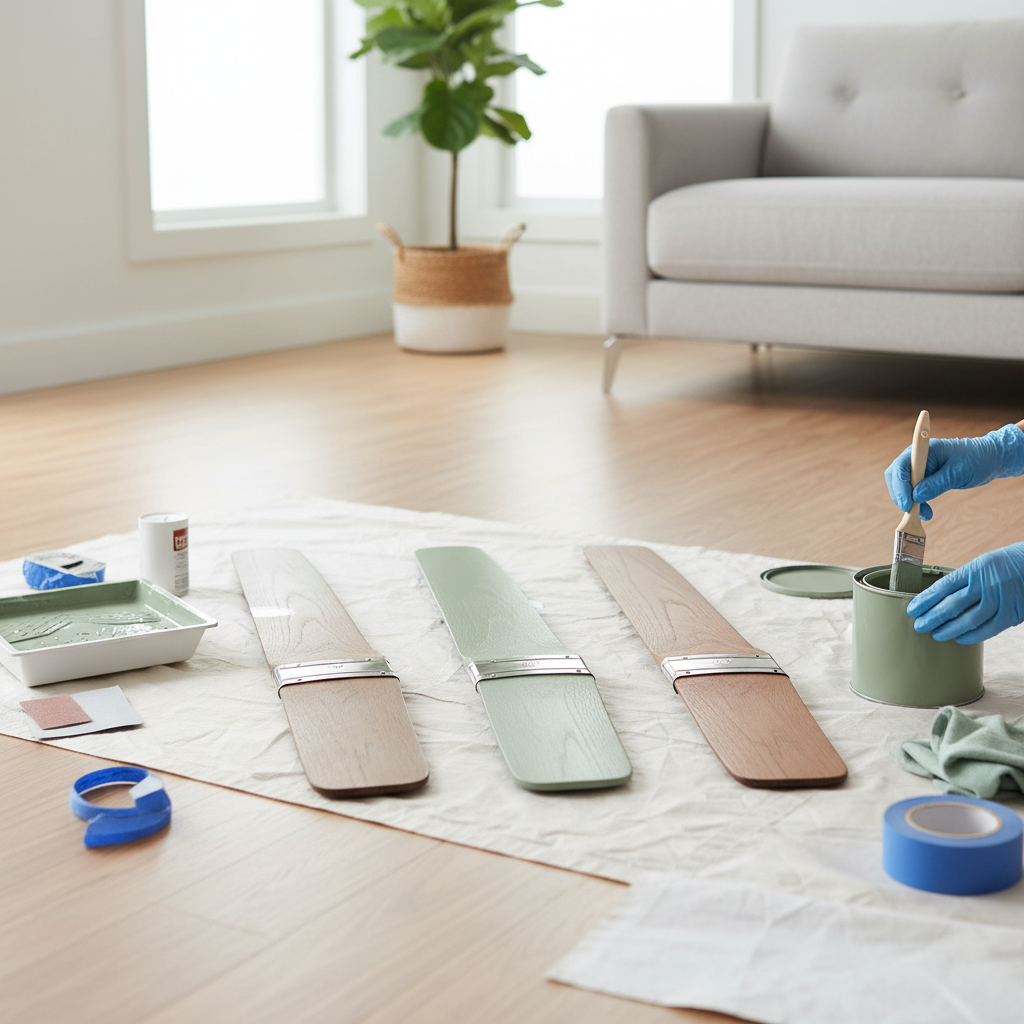
Before you begin your fan blade makeover, gathering all necessary tools and materials will ensure a smooth and efficient process. Here’s a comprehensive list:
- Screwdriver Set: Essential for disassembling your fan. Keep screws organized!
- Drop Cloths or Newspaper: To protect your workspace from paint splatters.
- 100-180 Grit Sandpaper: For scuffing surfaces and removing old paint or gloss.
- Mild Soap, Baby Wipes, or All-Purpose Cleaner (e.g., Sugar Soap): For thorough cleaning of all fan parts.
- Clean Rags: For wiping down surfaces.
- Painter’s Tape: To mask off any areas you don’t want painted.
- Protective Gloves: To keep your hands clean and safe from paint.
- Protective Mask/Respirator: Especially important if working with spray paint in a less-ventilated area.
- Spray Paint: Choose a flat or enamel-based formula. A paint-and-primer-in-one product is often ideal. Avoid glossy finishes as they can create distracting glare.
- Dedicated Primer (Optional but Recommended): Particularly useful if your blades are dark and you’re painting them a lighter color, or if they have a very slick surface.
- Clear Coat Varnish (Optional): To add an extra layer of protection and durability to your finished blades.
- Small Touch-Up Brush (Optional): For minor corrections.
Prepping Your Fan Blades for a Flawless Finish
Proper preparation is the cornerstone of any successful painting project. Skimping on these initial steps can lead to poor paint adhesion and a less-than-professional result.
Safety First: Disconnecting Power
|
Our Picks for the Best Ceiling fan in 2026
As an Amazon Associate I earn from qualifying purchases.
|
||
| Num | Product | Action |
|---|---|---|
| 1 | Ceiling Fans with Lights - 42 Inch Low Profile Ceiling Fan with Light and Remote, Reversible DC Motors, 3CCT Dimmable Timer Noiseless, Black Flush Mount Ceiling Fan for Bedroom/Living Room |

|
| 2 | addlon Ceiling Fans with Lights, 42 Inch Low Profile Ceiling Fan with Light and Remote Control, Flush Mount, Reversible, 3CCT, Dimmable, Quiet, Black Small Ceiling Fan for Bedroom Indoor/Outdoor Use |
|
| 3 | Ceiling Fans with Lights, 42 Inch Ceiling Fan with Light And Remote, 3CCT Flush Moun Low Profile Ceiling Fans, 6 Speed Noiseless LED Ceiling Fan, Black Ceilings Fan with Remote for Bedroom Living Room |
|
| 4 | Passky Ceiling Fans with Lights, 52 inch Sleek Ceiling Fan with Light and Remote Control, 3CCT, Dimmable, Reversible, Noiseless, Black Ceiling Fan for Bedroom, Living Room |
|
| 5 | ZMISHIBO 52 Inch Ceiling Fan with Light, App&Remote Control, Flush Mount Low Profile, Dimmable 20W LED Light, Quiet Reversible Motor for Bedroom, Living Room, Apartment, Black |
|
| 6 | Ceiling Fans with Lights, 52 Inch Modern Ceiling Fans with Lights and Remote Control, DC Reversible Motor, Noiseless, 3CCT, Ceiling Fan for Bedroom, Living Room, Apartment Indoor/Outdoor Use |
|
| 7 | ZMISHIBO Ceiling Fans with Lights and Remote, 19.7'' Low Profile Ceiling Fan, 3000-6000K Dimmable Modern Flush Mount LED Fan Light, 6 Wind Speeds, Black Fandelier Ceiling Fans for Bedroom |
|
| 8 | Asyko 46" Low Profile Ceiling Fan with Light and Remote Control,Black Modern Flush Mount Ceiling Fan with Lights for Bedroom, Reversible, Dimmable, Noiseless |
|
| 9 | Fanbulous 52 Inch Ceiling Fans with Lights and Remote, Stepless Color Temperature Change & Dimmable 20W LED Ceiling Fan, 6 Speeds Reversible Quiet DC Motor for Bedroom, Living Room, Apartment, Black |
|
| 10 | Amico Ceiling Fans with Lights, 42 inch Low Profile Ceiling fan with Light and Remote Control, Flush Mount, Reversible, 3CCT, Dimmable, Noiseless, Black Ceiling Fan for Bedroom, Indoor/Outdoor Use |
|
Before touching any part of your ceiling fan, always prioritize safety. Locate your home’s electrical panel and turn off the power to the ceiling fan’s circuit breaker. It’s also a good practice to test the fan light or rotation switch to confirm the power is off before proceeding.
Disassembly: Taking Your Fan Apart
Next, carefully disassemble your fan. If your fan has a light kit, remove the light shades and bulbs first to prevent breakage. Then, detach the fan from the ceiling, usually by sliding down the canopy cover and unscrewing the motor assembly from the hanger bracket. Once the main unit is down, carefully remove each fan blade from the motor housing and then separate the blades from their metal brackets. Place all screws and small parts into labeled baggies to avoid losing them and ensure easy reassembly.
Deep Cleaning for Optimal Adhesion
Ceiling fans are notorious dust and grime collectors. Before painting, every part you intend to paint—blades, motor housing, downrod, and blade brackets—must be meticulously cleaned. Use warm water with mild soap, baby wipes, or an all-purpose household cleaner to thoroughly wipe away all dust, dirt, grease, and any sticky residues. Ensure no debris remains, then allow all components to air dry completely. Painting over dirt will result in a bumpy, unprofessional finish and can prevent the paint from adhering properly.
Sanding and Priming: The Foundation of Your Makeover
Sanding helps the paint adhere better by creating a slightly textured surface. For most fan blades, especially wooden ones or those with a glossy finish, lightly sand them with 100-180 grit sandpaper. Sand with the grain of the blade, paying extra attention to the edges. This step removes any remaining grime and dulls glossy surfaces. After sanding, wipe away all dust with a clean, dry cloth.
If you’re painting dark blades a lighter color, or if your chosen paint doesn’t include primer, apply a dedicated primer. A thin, even coat of primer ensures better color coverage and adhesion. Allow the primer to dry completely according to the manufacturer’s instructions, usually a few hours, before moving to the next step. For very dark blades, you might apply a second thin coat of primer.
The Art of Painting: Achieving a Professional Look
With your fan parts prepped and ready, it’s time for the exciting part: applying color.
Choosing the Right Paint for Fan Blades
The best paint for fan blades is typically a flat or enamel-based spray paint. These types of paints offer excellent coverage and a smooth, durable finish suitable for surfaces that might experience slight vibrations.
“When choosing paint, opt for quality spray enamels or flat finishes. Glossy paints can create a distracting glare, especially under certain lighting conditions, making your fan stand out for the wrong reasons.” – John Smith, Professional Painter and DIY Expert
Avoid overly glossy paints, as they can reflect light unpleasantly. Many DIYers prefer a paint-and-primer-in-one product, which simplifies the process, especially for blades that don’t require extensive priming.
| Blade Material | Recommended Paint Type | Key Considerations |
|---|---|---|
| Wood | Enamel or Acrylic Latex (spray or brush) | Light sanding and primer are crucial for adhesion. |
| Plastic | Plastic-bonding spray paint (e.g., “for plastics”) | Minimal sanding might be needed; primer often beneficial. |
| Metal | Rust-inhibiting enamel spray paint | Primer is highly recommended, especially for old metal. |
Spray Painting Techniques for Even Coverage
Working in a well-ventilated area, ideally outdoors or in a garage with open windows, is critical when using spray paint. Lay your prepped fan blades and hardware on your drop cloths or newspaper.
Shake your spray paint can vigorously for at least one minute before use and periodically during painting. Test the nozzle on a scrap piece of cardboard to check the spray pattern and pressure. Hold the can approximately 6 to 8 inches away from the surface of the blade. Apply the paint in thin, even coats, using a steady, side-to-side sweeping motion. Over-applying paint in one spot can lead to drips and an uneven finish.
It’s better to apply two or three thin coats than one thick coat. Allow each coat to dry completely to the touch before applying the next, usually 15-30 minutes, depending on humidity and paint type. This patience is key to a smooth, durable finish. Start with the blades, as they usually dry faster, allowing you to move on to the hardware while the blades cure.
Don’t Forget the Hardware!
While the blades often get all the attention, painting the metal blade brackets, downrod, and canopy cover is essential for a cohesive look. Choose a color that matches or complements your chosen blade color, or perhaps even matches other metal fixtures in your room, like door hinges or light fixtures. Apply the same cleaning, sanding (if necessary), priming, and painting techniques to these smaller components.
Reassembly and Final Touches
Once all painted parts are thoroughly dry, it’s time to put your transformed fan back together.
Allow Adequate Drying Time: Resist the urge to rush. While the paint may feel dry to the touch in an hour or two, it often takes 24 hours or even longer for it to fully cure and harden. Allowing ample drying time prevents smudges, scratches, and ensures a durable finish.
Careful Reinstallation: Reattach the blades to their brackets, then the brackets to the motor housing. Refer to the photos you took during disassembly to ensure everything goes back correctly. Mount the fan back onto the ceiling bracket, reconnect the wiring (ensuring you match the colors correctly), and reinstall the light kit components. Turn the power back on at the circuit breaker.
Optional: Sealing with a Clear Coat: For an extra layer of protection, especially in high-humidity environments or for blades that might see more wear, consider applying a clear coat varnish. This can enhance durability and make the surface easier to clean. Be aware that some clear coats might slightly alter the sheen of metallic paints.
Expert Tips for a Lasting Fan Blade Makeover
- Avoid Excessive Paint: Resist the temptation to apply too many thick coats. Excessive paint can add weight to the blades, potentially unbalancing the fan, causing it to wobble, shake, or even affect its operational efficiency. Two thin, even coats are typically sufficient.
- Consider Your Room’s Palette: When choosing colors, think about the overall aesthetic of your room. Matching blade colors to furniture or wall tones creates a harmonious look, while contrasting colors can add a vibrant pop. For fan hardware, consider matching existing metal accents like door handles or light fixtures for a polished finish. Neutral shades like ivory, taupe, or gray are versatile and timeless.
- Regular Maintenance: To keep your newly painted blades looking pristine, dust them regularly with a soft cloth. Avoid abrasive cleaners or harsh chemicals that could damage the paint finish.
- Creative Designs: Don’t just stick to a single color! Consider using painter’s tape to create stripes, geometric patterns, or even stencils for a truly artistic and personalized fan.
Conclusion
Giving your old fan blades a makeover is an accessible and rewarding DIY project that revitalizes your home decor without breaking the bank. By carefully following the steps for preparation, painting, and reassembly, you can achieve a professional, custom look that transforms an overlooked fixture into a stylish statement piece. This process not only saves money but also offers the immense satisfaction of creating something beautiful with your own hands.
Are you ready to give your outdated ceiling fan a fresh, new identity and elevate the style of your living space?