Is your ceiling fan struggling to keep pace, spinning lazily, or refusing to start at all? Before you consider replacing the entire unit, understand that a common culprit behind these issues is often a faulty ceiling fan capacitor. This guide will walk you through the straightforward process of how to replace a ceiling fan capacitor yourself, helping you restore your fan’s full power and extend its lifespan without needing a costly professional service. With a few basic tools and a careful approach, you can bring that refreshing breeze back to your home.
What is a Ceiling Fan Capacitor? An Overview
At its core, a ceiling fan capacitor is an electrical component designed to store and release electrical energy, playing a pivotal role in the fan’s operation. Its primary function is to provide the initial torque needed to start the fan motor and maintain consistent speed once it’s running. Modern ceiling fans typically utilize a single-phase (split-phase induction) motor, which requires a capacitor to create a phase shift in the electrical current. This phase shift is essential for generating a rotating magnetic field, which in turn causes the fan blades to spin.
Over time, these vital components can degrade due to heat, age, or power surges. When a capacitor begins to fail, you’ll often notice specific symptoms. These include the fan humming loudly but not spinning, rotating at a significantly reduced speed even on its highest setting, or failing to start altogether while the light kit might still function perfectly. Identifying these signs early can save you from unnecessary frustration and lead you directly to the capacitor as the source of the problem.
Diagnosing Your Ceiling Fan: When to Replace the Capacitor
Recognizing when a ceiling fan capacitor needs replacement is the first step in troubleshooting. As mentioned, common indicators include a fan that hums but doesn’t spin, spins slowly on all settings, or operates erratically. If your fan exhibits these symptoms, especially after years of reliable service, a failing capacitor is a very likely cause. These issues stem from the capacitor’s diminished ability to store and discharge the necessary electrical charge to the fan motor effectively.
While some advanced methods involve using a multimeter to test a capacitor’s capacitance, a visual inspection can often provide clues. Look for any physical signs of damage on the existing capacitor, such as bulging, leaking fluid, or burn marks. These are clear indications that the component has failed and requires immediate replacement. If no visible damage is present, but the symptoms persist after ruling out other simple issues like loose wiring, proceeding with a capacitor replacement is still a logical next step in your DIY repair journey.
Types of Ceiling Fan Capacitors and How to Choose the Right One
Ceiling fan capacitors come in various forms, but the most common type you’ll encounter is a CBB61 capacitor. These are typically rectangular or square plastic boxes with multiple wires. Understanding the different types and how to select the correct replacement is crucial for a successful repair.
Capacitors can vary based on the number of wires they have, which corresponds to the number of speeds your fan offers, plus potentially a wire for a light kit. A simple fan might use a capacitor with just two wires, primarily for starting and maintaining a single speed. More complex fans, especially those with multiple speed settings and a light, often use a “3-in-1” capacitor or even five-wire versions. These capacitors integrate different microfarad (uF) values to deliver varying power levels to the motor, thus controlling the fan’s speed.
The most critical aspect of choosing a replacement capacitor is matching its specifications to the original. You must match both the microfarad (uF) rating and the voltage (V) rating. The uF rating determines the electrical capacity and directly impacts fan speed. Using a capacitor with a different uF rating can cause the fan to spin too fast or too slow, or even damage the motor. The voltage rating should meet or exceed that of the original to ensure safe operation. All these specifications are usually printed directly on the body of the old capacitor. Take a clear picture or write down the exact numbers before you purchase a new one.
Essential Tools and Safety Precautions for DIY Replacement
Before beginning any electrical work, safety must be your absolute priority. Working with electricity can be dangerous if proper precautions are not followed.
Here’s a list of the essential tools you’ll need for this DIY project:
- Screwdriver set: Phillips and flathead to access the fan’s components.
- Voltage tester (non-contact recommended): Crucial for verifying power is off.
- Wire strippers: If you need to cut and re-strip wires.
- Wire nuts: To securely connect new wires.
- Electrical tape: For added insulation and security.
- Stepladder: To safely reach the ceiling fan.
- New capacitor: Matching the specifications of your old one.
- Pliers (optional): For holding or twisting wires.
Safety Precautions:
- Turn off the Power: This is the most critical step. Locate the circuit breaker that controls the ceiling fan and switch it to the “OFF” position. Don’t rely solely on the wall switch.
- Verify Power is Off: Use your non-contact voltage tester to confirm there is no power flowing to the fan’s wiring before you touch anything.
- Discharge the Capacitor: Capacitors can store an electrical charge even after power is disconnected. While most small ceiling fan capacitors self-discharge quickly, it’s a good practice to briefly touch a screwdriver with an insulated handle across the capacitor terminals (being careful not to short circuit other components) to ensure it’s fully discharged. This prevents a potential shock.
- Work in a Well-Lit Area: Ensure you have adequate lighting to clearly see the wiring and components.
- Proper Grounding: Ensure your fan and home’s electrical system are properly grounded.
Always remember that if you are uncomfortable or unsure at any point, it’s best to consult a licensed electrician.
Step-by-Step Guide: Replacing Your Ceiling Fan Capacitor
With safety precautions in mind and your tools ready, you can now proceed with replacing the capacitor.
Step 1: Disconnect Power and Access the Fan
|
Our Picks for the Best Ceiling fan in 2026
As an Amazon Associate I earn from qualifying purchases.
|
||
| Num | Product | Action |
|---|---|---|
| 1 | Ceiling Fans with Lights, 42 Inch Ceiling Fan with Light And Remote, 3CCT Flush Moun Low Profile Ceiling Fans, 6 Speed Noiseless LED Ceiling Fan, Black Ceilings Fan with Remote for Bedroom Living Room |

|
| 2 | addlon Ceiling Fans with Lights, 42 Inch Low Profile Ceiling Fan with Light and Remote Control, Flush Mount, Reversible, 3CCT, Dimmable, Quiet, Black Small Ceiling Fan for Bedroom Indoor/Outdoor Use |
|
| 3 | Asyko 46" Low Profile Ceiling Fan with Light and Remote Control,Black Modern Flush Mount Ceiling Fan with Lights for Bedroom, Reversible, Dimmable, Noiseless |
|
| 4 | ZMISHIBO Ceiling Fans with Lights and Remote, 19.7'' Low Profile Ceiling Fan, 3000-6000K Dimmable Modern Flush Mount LED Fan Light, 6 Wind Speeds, Black Fandelier Ceiling Fans for Bedroom |
|
| 5 | Fanbulous 52 Inch Ceiling Fans with Lights and Remote, Stepless Color Temperature Change & Dimmable 20W LED Ceiling Fan, 6 Speeds Reversible Quiet DC Motor for Bedroom, Living Room, Apartment, Black |
|
| 6 | ZMISHIBO 52 Inch Ceiling Fan with Light, App&Remote Control, Flush Mount Low Profile, Dimmable 20W LED Light, Quiet Reversible Motor for Bedroom, Living Room, Apartment, Black |
|
| 7 | Passky Ceiling Fans with Lights, 52 inch Sleek Ceiling Fan with Light and Remote Control, 3CCT, Dimmable, Reversible, Noiseless, Black Ceiling Fan for Bedroom, Living Room |
|
| 8 | Ceiling Fans with Lights, 52 Inch Modern Ceiling Fans with Lights and Remote Control, DC Reversible Motor, Noiseless, 3CCT, Ceiling Fan for Bedroom, Living Room, Apartment Indoor/Outdoor Use |
|
| 9 | Ceiling Fans with Lights - 42 Inch Low Profile Ceiling Fan with Light and Remote, Reversible DC Motors, 3CCT Dimmable Timer Noiseless, Black Flush Mount Ceiling Fan for Bedroom/Living Room |
|
| 10 | Amico Ceiling Fans with Lights, 42 inch Low Profile Ceiling fan with Light and Remote Control, Flush Mount, Reversible, 3CCT, Dimmable, Noiseless, Black Ceiling Fan for Bedroom, Indoor/Outdoor Use |
|
Begin by ensuring the power to the ceiling fan is completely off at the circuit breaker. Confirm this by attempting to turn the fan on or using your voltage tester near the fan. Next, position your stepladder directly beneath the fan. Depending on your fan’s design, you may need to remove the light kit and/or the lower housing (canopy) to expose the motor and wiring compartment where the capacitor is typically located. Use your screwdriver to carefully remove any securing screws.
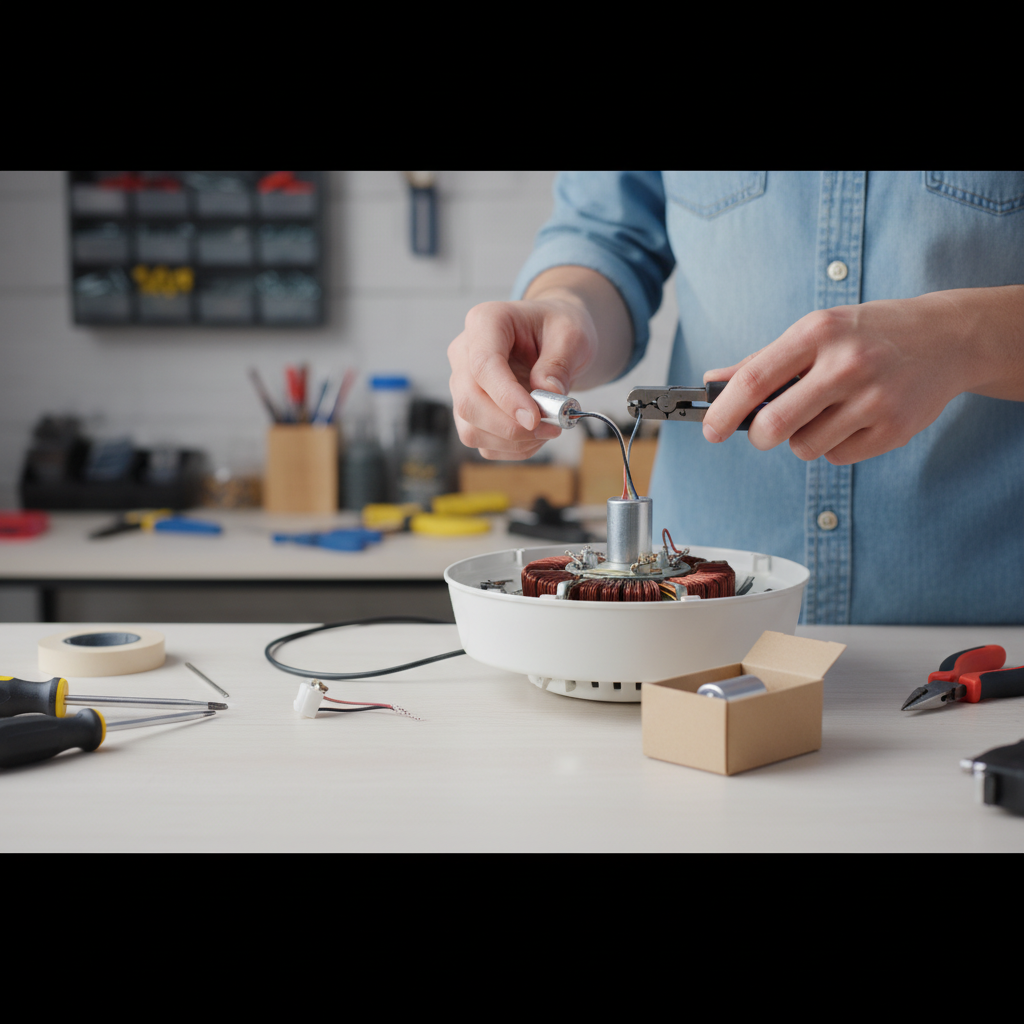
Step 2: Locate and Disconnect the Old Capacitor
Once the wiring compartment is accessible, locate the capacitor. It will usually be a small, rectangular, or cylindrical component with several wires extending from it, often connected to the fan’s internal wiring with wire nuts. Before disconnecting anything, take a clear photo of the existing wiring connections. This photo will serve as your essential reference when connecting the new capacitor. Carefully note the color of each wire connected to the capacitor and its corresponding connection point on the fan. Gently unscrew any wire nuts or use wire cutters to snip the wires connected to the old capacitor, making sure to leave enough wire length on the fan side for reconnection.
Step 3: Select and Prepare the New Capacitor
Retrieve your new capacitor. Double-check that its microfarad (uF) and voltage (V) ratings precisely match those of the old capacitor. If the new capacitor has different colored wires but the same uF values, refer to your old capacitor’s wiring or the fan’s manual to ensure you’re connecting the correct uF value to the corresponding fan wires. If the new capacitor wires are not pre-stripped, use your wire strippers to expose about half an inch of bare wire on each lead. Do the same for the wires on the fan side that you previously cut.
Step 4: Connect the New Capacitor
Using your reference photo, connect the wires from the new capacitor to the corresponding wires from the fan. Twist the bare ends of the matching wires together clockwise, then secure each connection with a wire nut. Ensure the wire nut is tight and no bare wire is exposed. For extra security, you can wrap each wire nut connection with electrical tape. If your fan uses a multi-speed capacitor (e.g., 3-in-1), carefully connect each uF value wire to its correct fan wire according to your reference photo. For example, the wire for the “low” speed setting on the capacitor must connect to the fan’s “low” speed wire.
Step 5: Secure and Reassemble
Once all connections are made and secured, carefully tuck the wires and the new capacitor back into the fan’s wiring compartment. Ensure no wires are pinched or positioned where they could interfere with the fan’s rotation or become damaged. Reattach the fan’s canopy and any light kit components you removed, screwing them securely back into place.
Step 6: Restore Power and Test the Fan
Finally, return to your circuit breaker panel and switch the power back on to the ceiling fan. Test the fan at all its speed settings and functions (including the light, if applicable). If installed correctly, your fan should now operate smoothly, quietly, and at its intended speeds. Celebrate your successful DIY repair!
Troubleshooting Common Issues After Replacement
Even with careful execution, sometimes issues can arise after replacing a ceiling fan capacitor. Here are a few common problems and their potential solutions:
-
Fan not starting or still spinning slowly:
- Check power: Reconfirm the circuit breaker is on and the wall switch is functioning.
- Wiring connections: Double-check all wire nut connections for tightness and proper alignment. Ensure no wires have come loose.
- Capacitor rating: Verify that the new capacitor’s uF rating exactly matches the old one. A mismatch can cause incorrect speed or failure to start.
- Motor issues: If everything else checks out, the motor itself might have a deeper problem, requiring professional assessment or fan replacement.
-
Fan spins in reverse direction (when not intended): This is rare but can happen if the capacitor’s wires are connected incorrectly, potentially reversing the phase shift. Review your wiring diagram carefully.
-
Fan makes humming noise: A slight hum is normal for some fans. However, if it’s a new or louder hum, ensure all screws (especially those holding the fan blades and motor housing) are tightened. If the hum persists and the fan still struggles, there might be an internal motor issue or a capacitor with the wrong specifications.
Maintaining Your Ceiling Fan for Longevity
Replacing a capacitor can significantly extend your ceiling fan’s life, but ongoing maintenance also plays a role. Regularly clean fan blades to prevent dust buildup, which can unbalance the fan and strain the motor. Periodically check all screws on the fan canopy, motor housing, and blade attachments for tightness. For fans with pull chains, operate them gently to avoid damaging the internal switches.
While capacitors generally last for many years, they are often the first electrical component to fail in a fan due to continuous operation and exposure to heat. Knowing how to replace them empowers you to perform quick, cost-effective repairs, keeping your home comfortable and your energy bills in check.
Conclusion
Successfully replacing a ceiling fan capacitor is a rewarding DIY project that saves money and extends the life of your appliance. By carefully following safety protocols and the step-by-step instructions, you can restore your fan to optimal performance, ensuring a steady, refreshing breeze throughout your home. This simple repair demonstrates how a little knowledge and confidence can tackle common household issues.
Are you ready to take on this electrical challenge and enjoy a perfectly functioning fan once more?
Frequently Asked Questions
What causes a ceiling fan capacitor to go bad?
Ceiling fan capacitors typically fail due to heat exposure, continuous electrical stress, age, or occasional power surges. Over time, the internal components degrade, leading to a reduced ability to store and release electrical charge, which impairs the fan motor’s function.
Can I use a different uF capacitor than the original?
No, it is crucial to replace a capacitor with one that has the exact same microfarad (uF) rating as the original. Using a different uF value can cause the fan to run at incorrect speeds, overheat the motor, or even lead to motor failure.
Is replacing a ceiling fan capacitor dangerous?
Replacing a ceiling fan capacitor involves working with household electricity, which can be dangerous if proper safety precautions are not followed. Always turn off power at the circuit breaker and verify it with a voltage tester before beginning work. If unsure, consult a licensed electrician.
Where is the capacitor located in a ceiling fan?
The capacitor is usually housed within the fan’s motor housing or canopy, often nestled near the wiring connections where the main power supply connects to the fan motor. You will typically need to remove the light kit or the decorative housing to access it.
How do I know what capacitor to buy?
To purchase the correct replacement, you must identify the microfarad (uF) and voltage (V) ratings printed on your old capacitor. These specifications are critical; ensure your new capacitor matches these numbers precisely to guarantee proper fan operation.